This guide provides a walkthrough on how to set up automatic email forwarding in Google Workspace. While we’ve tailored this tutorial specifically for Deskhero integration, the same steps can be applied to many other platforms. To keep things cost-effective, we’ll use a “Group” in Google Workspace, avoiding any additional licensing costs for the mailbox.
Step 1: Create the Group
- Log in to your Google Workspace using admin credentials.
- Click Directory, Groups in the left menu
- Click “Create group”
- Give it a name, and, importantly, an email address (e.g., support@yourcompany.com).
- Click “Next”
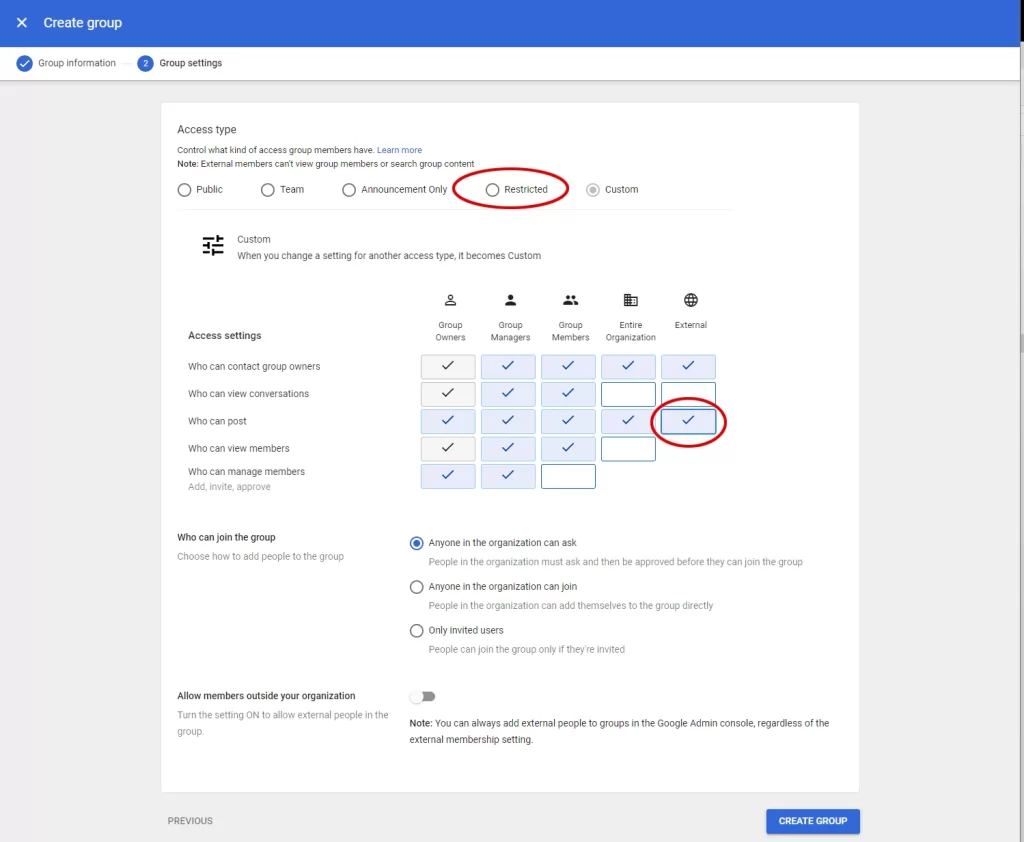
- Chose restricted, then check the “External” in “Who can post” to allow incoming emails from anyone on the internet.
- Click “Create group”


Step 2: Add the external email as receiver
After setting up your group, we’ll wrap it up by adding the destination address:
- Go back to groups
- Click to open your newly created group
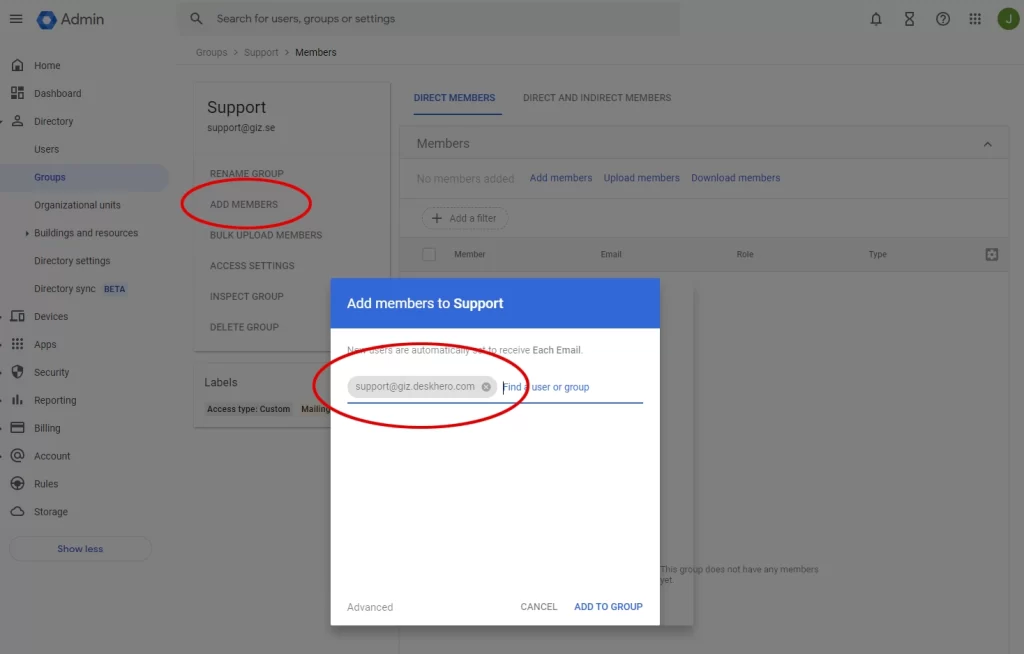
- Click “Add members”
- Input the destination email address. (For Deskhero, it’d be something like groupname@yourtenant.deskhero.com.)

In this Serie: